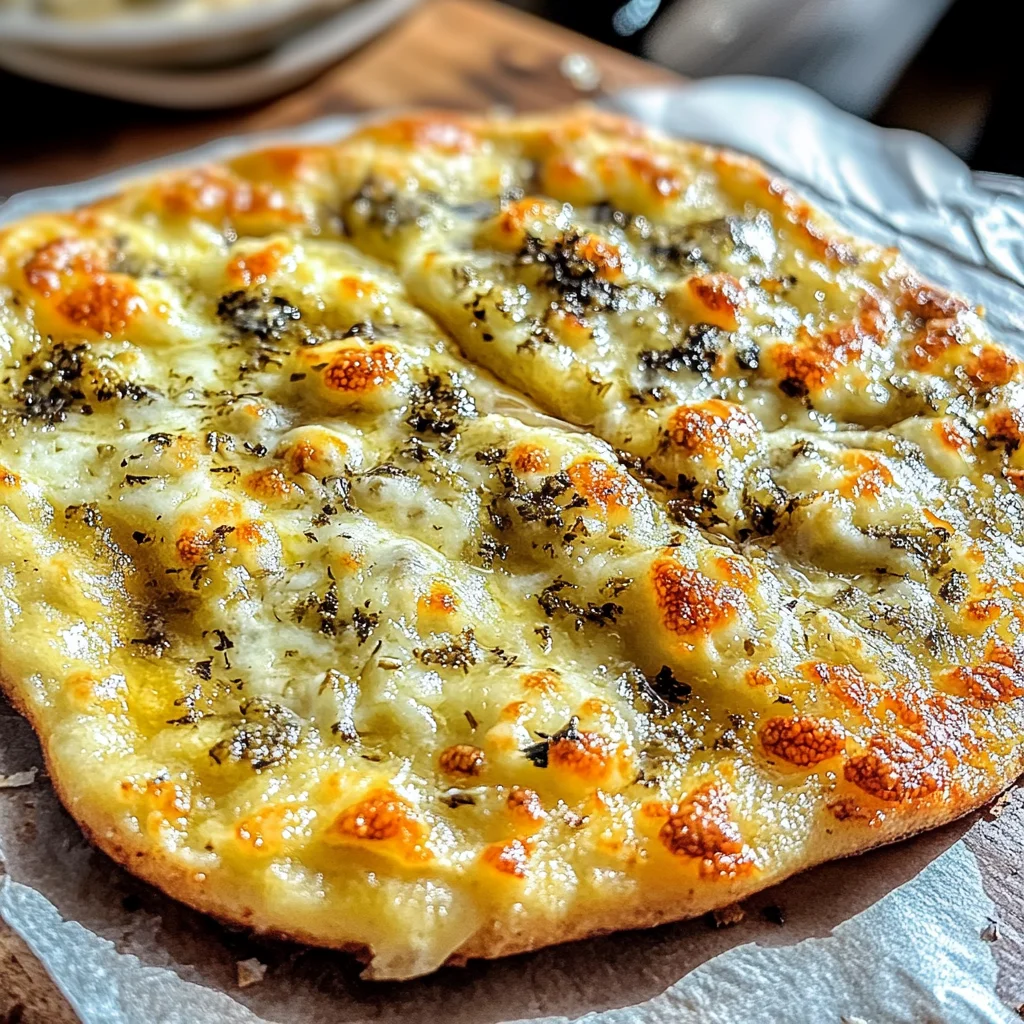
Garlic and Butter Flatbread
Garlic and Butter Flatbread is a delightful, homemade treat that elevates any meal or gathering. This soft, pillowy flatbread is infused with aromatic garlic and rich butter, making it perfect for dipping or simply enjoying on its own. Its golden-brown crust and fluffy interior make every bite a moment of pure bliss. Whether you’re hosting a game night, movie marathon, or cozy dinner, this flatbread is sure to impress your family and friends.
Why You’ll Love This Recipe
- Easy to Make: With just a few simple ingredients, you can whip up this delicious flatbread in no time!
- Versatile: Perfect as a side for soups, stews, or salads, or enjoy it as a standalone snack.
- Flavorful: The combination of garlic and butter creates an irresistible aroma and taste.
- Customizable: Feel free to add herbs or cheese for a personalized touch.
- Perfect for Sharing: Cut into slices, it’s ideal for gatherings and parties.
Tools and Preparation
Before you start making your Garlic and Butter Flatbread, gather your tools. Having the right equipment will make the process smoother and more enjoyable.
Essential Tools and Equipment
- Rolling pin
- Mixing bowls
- Baking sheet
- Parchment paper
Importance of Each Tool
- Rolling pin: Helps you flatten the dough evenly for perfectly shaped flatbreads.
- Mixing bowls: Essential for combining ingredients without mess.
- Baking sheet: A sturdy surface to bake your flatbread evenly.
- Parchment paper: Prevents sticking and makes cleanup a breeze.

Ingredients
For the Dough
- 2 cups all-purpose flour
- 1 cup warm water (110°F/43°C)
- 2 tsp active dry yeast
- 1 tsp salt
- 2 tbsp extra virgin olive oil
For the Garlic Butter Topping
- 2 cloves garlic, minced
- 4 tbsp unsalted butter
How to Make Garlic and Butter Flatbread
Step 1: Activate the Yeast
- In a small bowl, mix warm water and yeast.
- Let it sit for 5-10 minutes, until it becomes foamy.
Step 2: Prepare the Dough
- In a large mixing bowl, combine flour and salt.
- Stir in the activated yeast mixture along with olive oil until a shaggy dough forms.
Step 3: Knead the Dough
- Transfer the dough to a floured surface.
- Knead for about 8-10 minutes until smooth and elastic.
Step 4: Let It Rise
- Place the kneaded dough in an oiled bowl.
- Cover with a damp cloth and let rise in a warm area for about 1 hour or until doubled in size.
Step 5: Sauté the Garlic
- In a skillet over medium heat, melt butter.
- Add minced garlic and sauté for 1-2 minutes until fragrant.
Step 6: Shape the Flatbread
- Preheat your oven to 450°F (232°C).
- Roll out the risen dough on parchment paper into your desired shape.
- Brush with sautéed garlic butter.
Step 7: Bake It!
- Place the baking sheet in the oven.
- Bake for about 10-12 minutes or until golden brown.
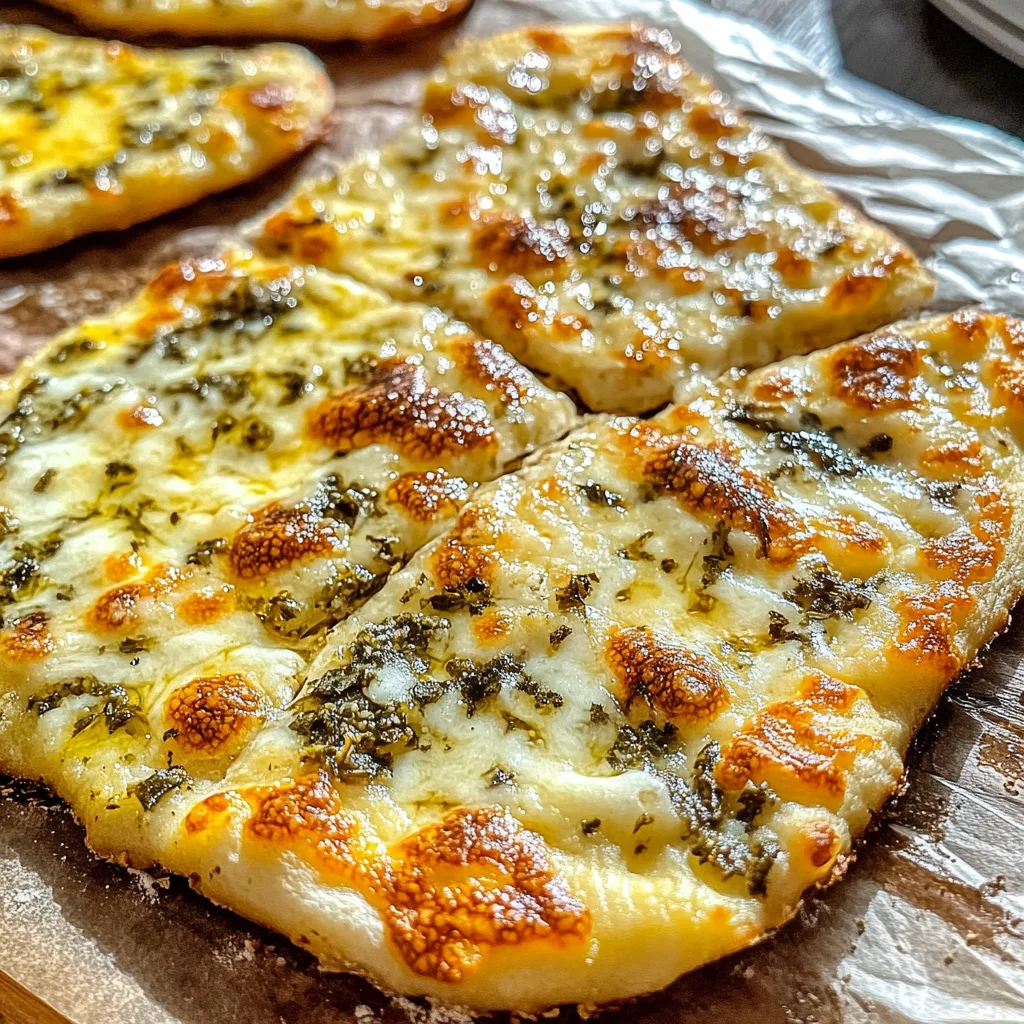
Enjoy your freshly made Garlic and Butter Flatbread!
How to Serve Garlic and Butter Flatbread
Garlic and Butter Flatbread is versatile and pairs well with many dishes. Whether you are hosting a casual gathering or enjoying a quiet night in, these serving suggestions will enhance your dining experience.
With Dips
- Hummus – A creamy chickpea dip that adds a nutty flavor.
- Tzatziki – This refreshing yogurt-based dip with cucumber is perfect for cooling down the garlic heat.
- Guacamole – Creamy avocado dip that complements the flatbread’s buttery taste.
As a Side
- Soup – Pair it with a bowl of warm tomato soup for a comforting combo.
- Salad – Serve alongside a fresh garden salad to add texture and flavor.
- Grilled Vegetables – Roasted or grilled veggies make for a colorful and healthy side.
For Snacking
- Cheese Platter – Add some cheeses like feta or mozzarella for a delightful snack spread.
- Olives – A mix of olives can introduce briny flavors that contrast nicely with the flatbread.
How to Perfect Garlic and Butter Flatbread
Creating the perfect Garlic and Butter Flatbread requires attention to detail. Follow these tips for the best results.
- Use Fresh Ingredients – Fresh garlic and high-quality butter will enhance the overall flavor of your flatbread.
- Knead Properly – Kneading until smooth and elastic helps develop gluten, giving the bread its desirable texture.
- Watch Rising Times – Allowing sufficient time for the dough to rise is crucial; under-proofed dough can lead to dense flatbread.
- Preheat Your Oven – Ensuring your oven is fully preheated allows for even baking and creates a nice crust.
- Experiment with Toppings – Don’t hesitate to add fresh herbs or cheese before baking for an extra flavor boost.
Best Side Dishes for Garlic and Butter Flatbread
Garlic and Butter Flatbread pairs wonderfully with various dishes, making it an excellent addition to your meal. Here are some side dishes that complement it beautifully.
- Caprese Salad – Fresh tomatoes, mozzarella, and basil drizzled with balsamic glaze create a refreshing contrast.
- Roasted Chickpeas – Crunchy chickpeas seasoned with spices provide a delightful crunch alongside your flatbread.
- Stuffed Peppers – Colorful bell peppers filled with rice and vegetables add heartiness to your meal.
- Mediterranean Quinoa Salad – A light salad of quinoa, cucumbers, tomatoes, and olives brings vibrant flavors.
- Grilled Chicken Skewers – Juicy chicken skewers seasoned with herbs make an excellent protein-rich side.
- Spinach Artichoke Dip – Creamy dip served warm is perfect for scooping up with pieces of flatbread.
Common Mistakes to Avoid
Making Garlic and Butter Flatbread can be straightforward, but some common mistakes can hinder your results.
- Skipping the yeast activation: Always activate the yeast in warm water before mixing it into your dough. This step ensures that your flatbread rises properly.
- Not kneading enough: Kneading the dough for at least 8-10 minutes is crucial for developing gluten. This provides the flatbread with its desired texture.
- Overbaking: Keep a close eye on your flatbread while it bakes. Once it’s golden brown, it’s done. Overbaking can lead to dryness.
- Using cold ingredients: Ensure that your water is warm (around 110°F/43°C) when activating the yeast. Cold ingredients can slow down the fermentation process.
- Neglecting flavor additions: Don’t forget to enhance the garlic butter with fresh herbs like rosemary or oregano for extra flavor. This simple addition elevates your flatbread significantly.
Storage & Reheating Instructions
Refrigerator Storage
- Store leftover flatbread in an airtight container.
- It will stay fresh in the refrigerator for up to two days.
Freezing Garlic and Butter Flatbread
- Wrap individual pieces tightly in plastic wrap or aluminum foil.
- Place them in a freezer-safe bag or container and freeze for up to three months.
Reheating Garlic and Butter Flatbread
- Oven: Preheat your oven to 350°F (175°C). Place the flatbread directly on the oven rack for about 5-7 minutes until warmed through.
- Microwave: Use a microwave-safe plate and cover with a damp paper towel. Heat for about 15-20 seconds per piece.
- Stovetop: Heat a non-stick skillet over medium heat and warm each piece for about 1-2 minutes on each side.
Frequently Asked Questions
Here are some commonly asked questions about making Garlic and Butter Flatbread.
Can I use whole wheat flour instead of all-purpose flour?
Yes, you can substitute whole wheat flour. However, you may need to adjust the water amount as whole wheat absorbs more moisture.
What can I serve with Garlic and Butter Flatbread?
Garlic and Butter Flatbread pairs well with dips like hummus, tzatziki, or even soups and salads for a complete meal.
How do I make my Garlic and Butter Flatbread crispy?
To achieve a crispy texture, bake at a higher temperature and consider using a pizza stone if available.
Can I add cheese to my Garlic and Butter Flatbread?
Absolutely! Sprinkle your favorite cheese on top before baking for a delicious cheesy twist.
Final Thoughts
Garlic and Butter Flatbread is not only easy to make but also incredibly versatile. With its soft texture and rich flavors, it’s perfect as a snack or an accompaniment to various dishes. Feel free to customize it by adding herbs or cheeses to suit your taste!
Garlic and Butter Flatbread

Garlic and Butter Flatbread is a delightful homemade bread that transforms any meal into a memorable experience. This soft, fluffy flatbread is infused with the rich flavors of aromatic garlic and creamy butter, creating an irresistible treat that’s perfect for dipping, snacking, or enjoying on its own.
- Prep Time: 20 minutes
- Cook Time: 12 minutes
- Total Time: 32 minutes
- Yield: Approximately 8 servings 1x
- Category: Side
- Method: Baking
- Cuisine: International
Ingredients
- 2 cups all-purpose flour
- 1 cup warm water (110°F/43°C)
- 2 tsp active dry yeast
- 1 tsp salt
- 2 tbsp extra virgin olive oil
- 2 cloves garlic, minced
- 4 tbsp unsalted butter
Instructions
- Activate the yeast by mixing warm water and yeast in a small bowl; let it sit for 5-10 minutes until foamy.
- In a large bowl, combine flour and salt. Stir in the activated yeast mixture and olive oil until a shaggy dough forms.
- Knead the dough on a floured surface for 8-10 minutes until smooth and elastic.
- Place the dough in an oiled bowl, cover with a damp cloth, and let rise for about 1 hour or until doubled in size.
- Sauté the minced garlic in melted butter over medium heat for 1-2 minutes until fragrant.
- Preheat your oven to 450°F (232°C). Roll out the risen dough on parchment paper to your desired shape; brush with garlic butter.
- Bake on a baking sheet for about 10-12 minutes or until golden brown.
Nutrition
- Serving Size: 1 piece (about 50g)
- Calories: 150
- Sugar: 0g
- Sodium: 180mg
- Fat: 6g
- Saturated Fat: 3g
- Unsaturated Fat: 3g
- Trans Fat: 0g
- Carbohydrates: 20g
- Fiber: 1g
- Protein: 4g
- Cholesterol: 10mg