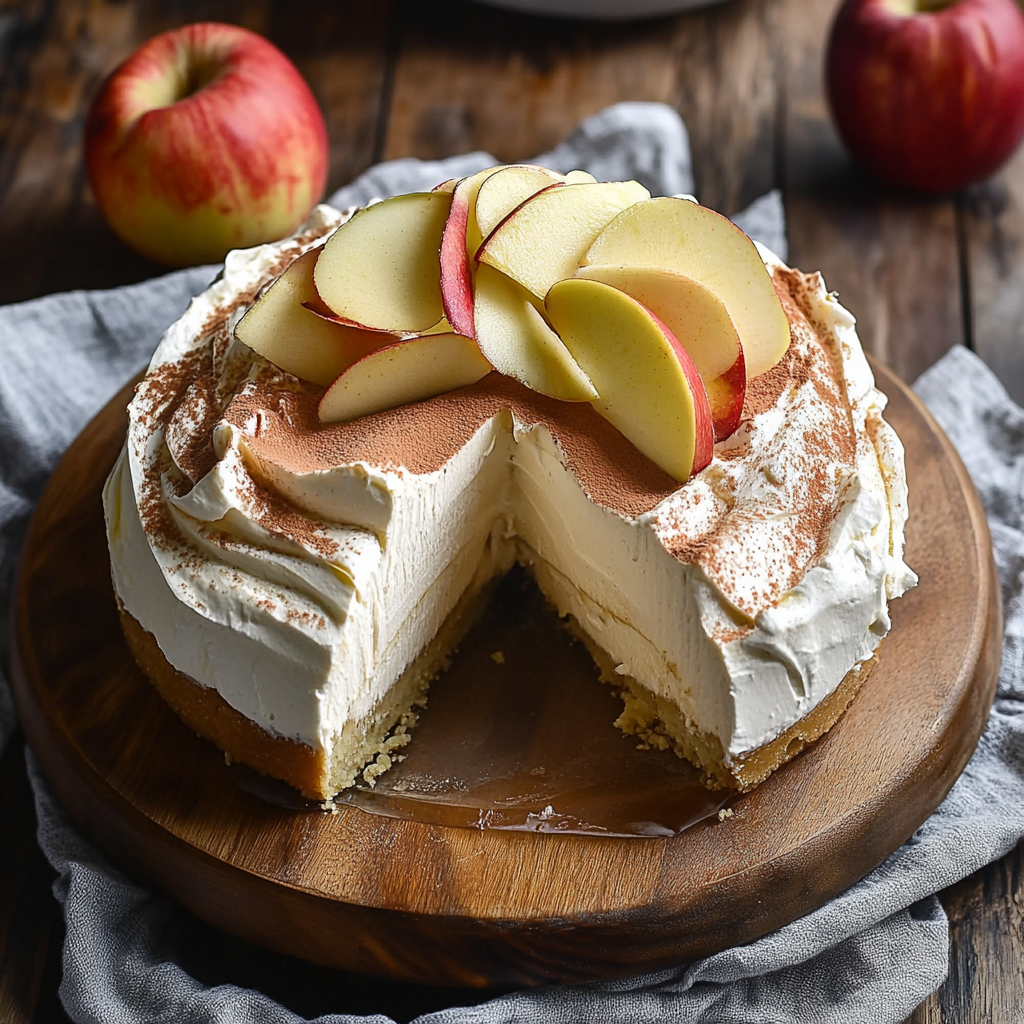
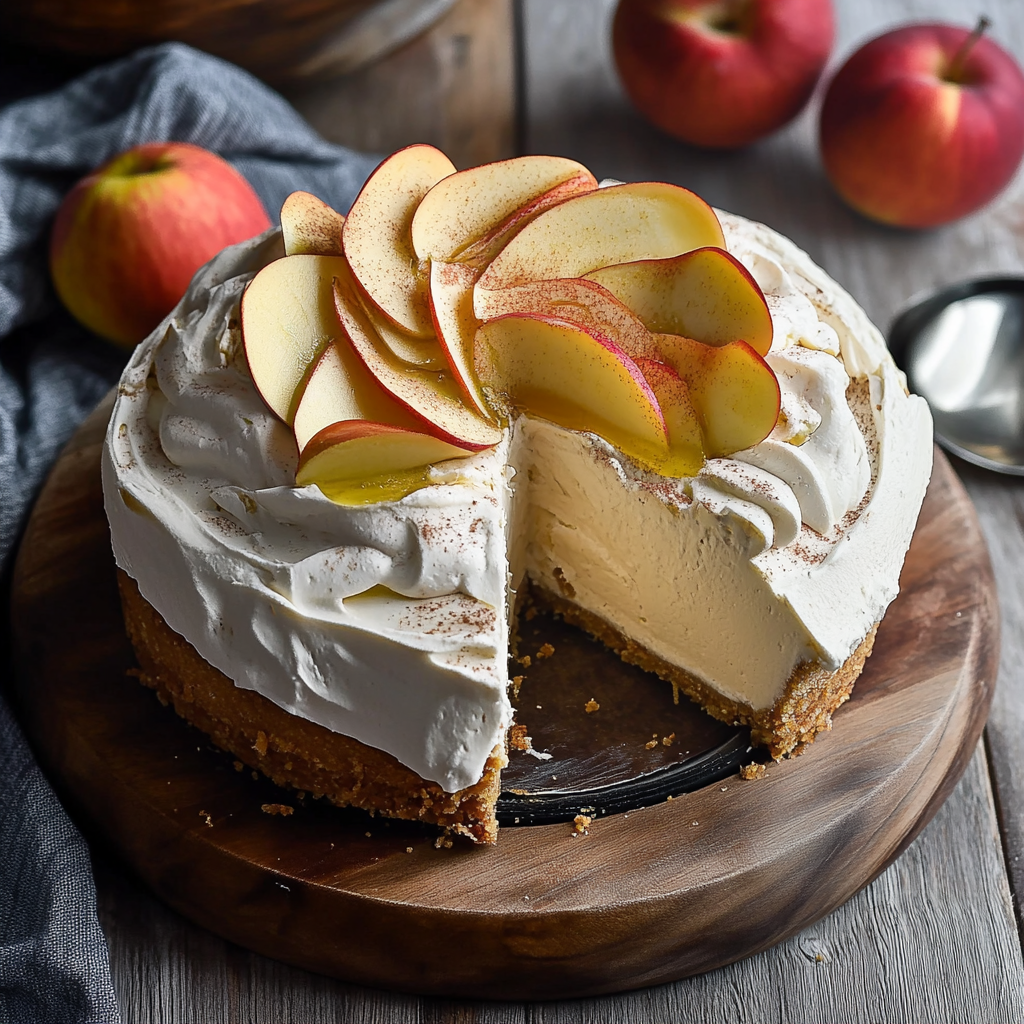
Apple Cider Cheesecake
How to Serve Apple Cider Cheesecake
Serving your Apple Cider Cheesecake in delightful ways can elevate your dessert experience. Here are some suggestions to enhance the presentation and flavor.
With Whipped Cream
- Top each slice with a dollop of freshly whipped cream for a light, airy contrast.
Drizzled with Caramel Sauce
- A drizzle of warm caramel sauce adds a rich sweetness that complements the tartness of the cheesecake perfectly.
Accompanied by Fresh Apples
- Serve slices with thinly sliced fresh apples for added crunch and an extra burst of apple flavor.
Pairing with Ice Cream
- A scoop of vanilla or cinnamon ice cream makes for a deliciously creamy pairing with the cheesecake.
Garnished with Nuts
- Sprinkle chopped pecans or walnuts on top for a delightful crunch and nutty flavor that contrasts beautifully with the smooth cheesecake.
Served on a Dessert Plate
- Present each slice on decorative dessert plates, garnished with mint leaves for an elegant touch.

How to Perfect Apple Cider Cheesecake
Creating the perfect Apple Cider Cheesecake requires attention to detail. Here are some tips to ensure your cheesecake turns out flawlessly.
- Use room temperature ingredients: Bring your cream cheese, eggs, and sour cream to room temperature before mixing. This helps achieve a smoother texture without lumps.
- Avoid overmixing: Mix just until combined after adding eggs. Overmixing can incorporate too much air, leading to cracks during baking.
- Bake in a water bath: Place your cheesecake pan inside another larger pan filled with hot water. This method helps maintain moisture and prevents cracking.
- Cool gradually: After baking, let the cheesecake cool slowly in the oven with the door slightly ajar. This gradual cooling helps reduce the risk of cracks.
- Chill thoroughly: Refrigerate for at least 8 hours before serving. This allows flavors to meld and improves the overall texture.
- Experiment with toppings: Feel free to get creative with toppings like spiced nuts or seasonal fruits to enhance both flavor and presentation.
Best Side Dishes for Apple Cider Cheesecake
Complementing your Apple Cider Cheesecake with side dishes can create a well-rounded dessert experience. Here are some great options to consider:
- Spiced Chai Tea
A warm cup of spiced chai tea offers comforting flavors that pair wonderfully with the cheesecake’s autumnal notes. - Maple Glazed Walnuts
Roasted walnuts coated in maple syrup provide a sweet, crunchy contrast that enhances every bite of cheesecake. - Cinnamon Sugar Puff Pastry Bites
Light, flaky pastries sprinkled with cinnamon sugar add an extra touch of indulgence alongside your cheesecake. - Ginger Snap Cookies
The spiciness of ginger snaps complements the apple flavors while providing a crunchy texture option alongside the creamy cheesecake. - Fruit Salad
A refreshing bowl of seasonal fruit salad balances the richness of cheesecake and adds color to your dessert table. - Hot Cocoa
A mug of rich hot cocoa makes for a cozy drink pairing that invites warmth against the chilled cheesecake.
Common Mistakes to Avoid
Making an Apple Cider Cheesecake can be a delightful experience, but there are common pitfalls to keep in mind.
- Skipping the cooling process: Allowing the cheesecake to cool gradually in the oven prevents cracking. Don’t rush this step; it helps achieve a smooth finish.
- Not using room temperature ingredients: Cold cream cheese can create lumps in your batter. Always soften your cream cheese and eggs beforehand for a creamy texture.
- Overmixing the batter: Mixing too vigorously can incorporate too much air, resulting in cracks during baking. Mix until just combined for the best results.
- Ignoring water bath necessity: A water bath ensures even baking and prevents dryness. Never skip this step; it’s essential for a creamy cheesecake.
- Undercooking the cheesecake: The middle should remain slightly wobbly when you take it out. If it’s too jiggly, give it more time in the oven to set properly.
Storage & Reheating Instructions
Refrigerator Storage
- Store in an airtight container for up to 5 days.
- Cover with plastic wrap if not using a container to prevent moisture loss.
Freezing Apple Cider Cheesecake
- Wrap slices tightly in plastic wrap and then aluminum foil for up to 2 months.
- For whole cheesecakes, freeze without toppings; add toppings fresh after thawing.
Reheating Apple Cider Cheesecake
- Oven: Preheat to 300°F (150°C). Place the cheesecake on a baking sheet and warm for about 15-20 minutes.
- Microwave: Heat individual slices on low power for 20-30 seconds until warm but not hot.
- Stovetop: Use a double boiler method, placing slices in a heat-safe dish over simmering water until warmed through.
Frequently Asked Questions
What makes Apple Cider Cheesecake different from regular cheesecake?
Apple Cider Cheesecake incorporates reduced apple cider, which adds a unique tangy flavor that captures the essence of autumn.
Can I use other types of cider for this recipe?
Yes! While fresh apple cider works best, other fruit ciders can be substituted for different flavor profiles.
How do I know when my Apple Cider Cheesecake is done?
The edges should be set while the center remains slightly wobbly. It will firm up as it cools.
Can I customize my Apple Cider Cheesecake?
Absolutely! Consider adding caramel sauce or chopped nuts as toppings for extra flavor and texture variations.
Is it necessary to chill the cheesecake before serving?
Yes, chilling allows the flavors to meld and enhances their creamy texture. Aim for at least 8 hours in the refrigerator before serving.
Final Thoughts
This Apple Cider Cheesecake is not only rich and creamy but also embodies fall’s flavors beautifully. With its tangy apple notes and customizable options, it’s perfect for any occasion. Don’t hesitate to try this recipe and make it your own!
Apple Cider Cheesecake
Indulge in the delightful flavors of fall with this creamy Apple Cider Cheesecake. This dessert beautifully marries the tangy notes of reduced apple cider with a rich cream cheese base, creating a uniquely satisfying treat that is perfect for any gathering. The smooth texture and spiced apple flavor offer an irresistible combination that will impress your guests and leave them wanting more. Whether you serve it plain or topped with caramel sauce and fresh apples, this cheesecake is sure to become a seasonal favorite.
- Prep Time: 20 minutes
- Cook Time: 60 minutes
- Total Time: 1 hour 20 minutes
- Yield: Serves approximately 12 slices 1x
- Category: Dessert
- Method: Baking
- Cuisine: American
Ingredients
- 2 cups graham cracker crumbs
- 1/2 cup unsalted butter, melted
- 4 (8 oz) packages cream cheese, softened
- 1 cup granulated sugar
- 1 cup sour cream
- 4 large eggs
- 1 cup apple cider, reduced
- 1 teaspoon vanilla extract
Instructions
- Preheat the oven to 325°F (163°C). Grease a 9-inch springform pan.
- In a bowl, combine graham cracker crumbs and melted butter. Press the mixture into the bottom of the prepared pan to form the crust.
- In a large mixing bowl, beat cream cheese and sugar until smooth. Add sour cream, reduced apple cider, and vanilla extract; mix until combined.
- Incorporate eggs one at a time, mixing gently after each addition.
- Pour the cheesecake mixture over the crust. Bake in a water bath for about 50-60 minutes or until edges are set and center is slightly wobbly.
- Allow to cool gradually in the oven with the door ajar for about an hour. Then refrigerate for at least 8 hours before serving.
Nutrition
- Serving Size: 1 slice (100g)
- Calories: 350
- Sugar: 24g
- Sodium: 250mg
- Fat: 24g
- Saturated Fat: 14g
- Unsaturated Fat: 8g
- Trans Fat: 0g
- Carbohydrates: 30g
- Fiber: 1g
- Protein: 6g
- Cholesterol: 70mg